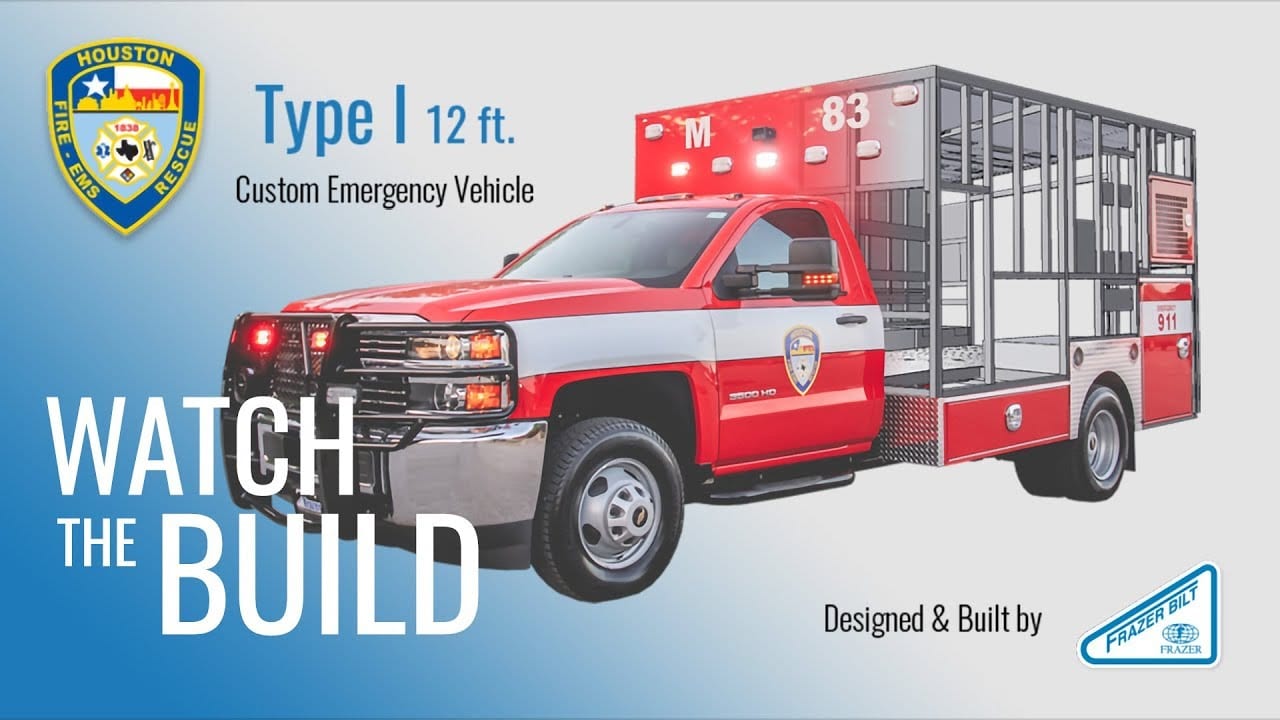
Follow the Build of a Houston Fire Department EMS Vehicle from Start to Finish!
Ever wonder how a custom emergency vehicle is made? We’re going to show you! We’re highlighting a TYPE I 12ft EMS Vehicle that we’ve just finished building for the Houston Fire Department (HFD).
The Houston Fire Department holds a special place in Frazer’s family of customers. HFD helped design and test Frazer’s first generator-powered EMS Prototype in 1982. Since then, Frazer has built over 165 EMS vehicles for the department. The most recent batch was built in 2019 and includes 15 EMS vehicles.
See how one of these HFD units was built from start to finish! Track the manufacturing process below:
Day 1: Framing and Welding Begin
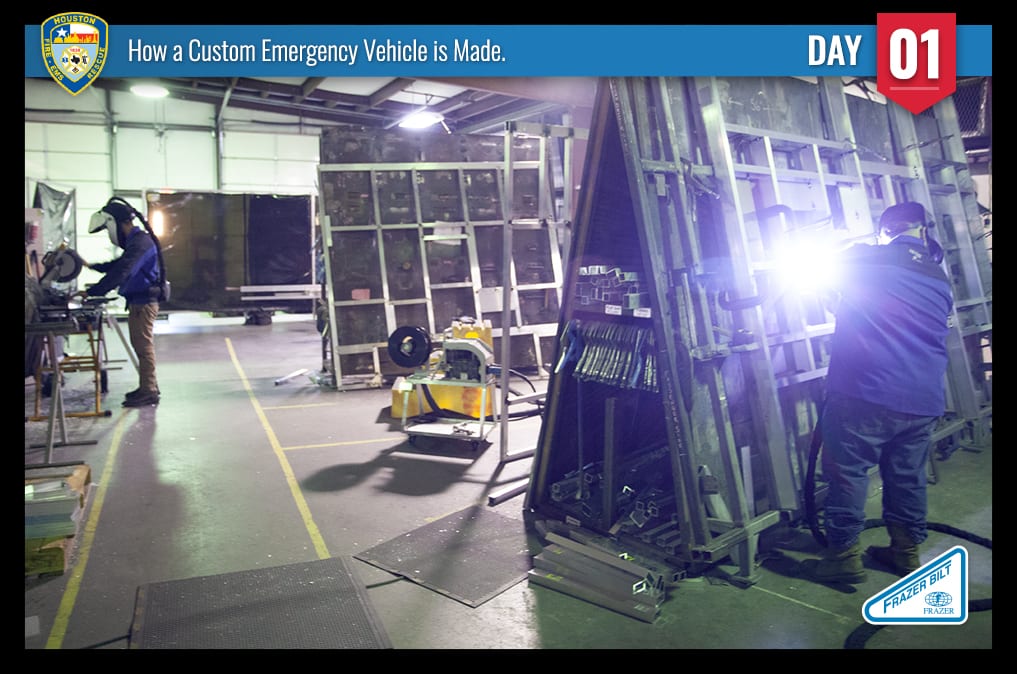
Frazer crew members use a jig (as seen above) to frame the base and front wall of the EMS module. This requires measuring and cutting pieces of aluminum, fitting them into place on the jig, then welding the joints together.
Frazer uses a welded, all aluminum construction that includes square and rectangular section tubing. We use aluminum because of its structural integrity and strength. It is not only good for the environment but has a natural oxide coating that protects it from degradation. Aluminum is also lighter than wood, so it provides more payload (sometimes 600 – 800 pounds).
Frazer has been building custom EMS vehicles suitable for licensing and use as Mobile Stroke Units, Mobile Clinics, and Ambulances since 1985.
Day 2: Framing and Welding Continue
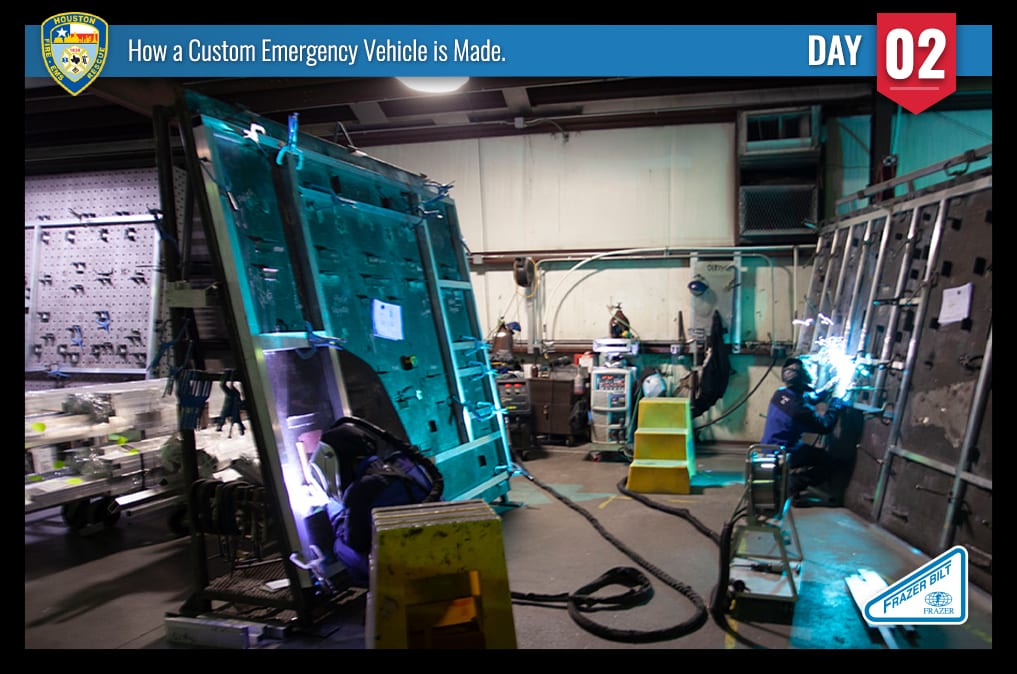
Frazer crew members frame and weld three more sections of the EMS module: a ceiling wall, a rear wall, and a passenger wall.
While framing of the box is underway, simultaneously we are fabricating other aluminum parts including cabinets, doors, compartments, and shelving.
Day 3: Framing and Welding Finish
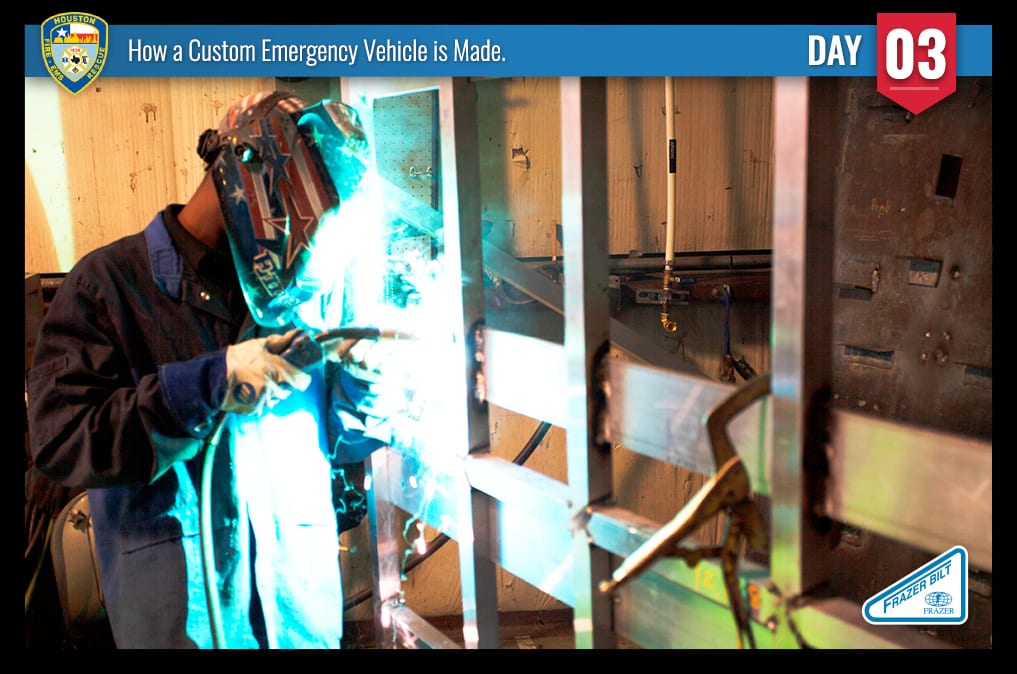
The crew finishes welding the passenger and ceiling walls. Now, all five walls needed to construct the module frame have been completed.
What’s next? Each wall moves down the production line to the skinning area.
Day 4: Skinning and Insulation
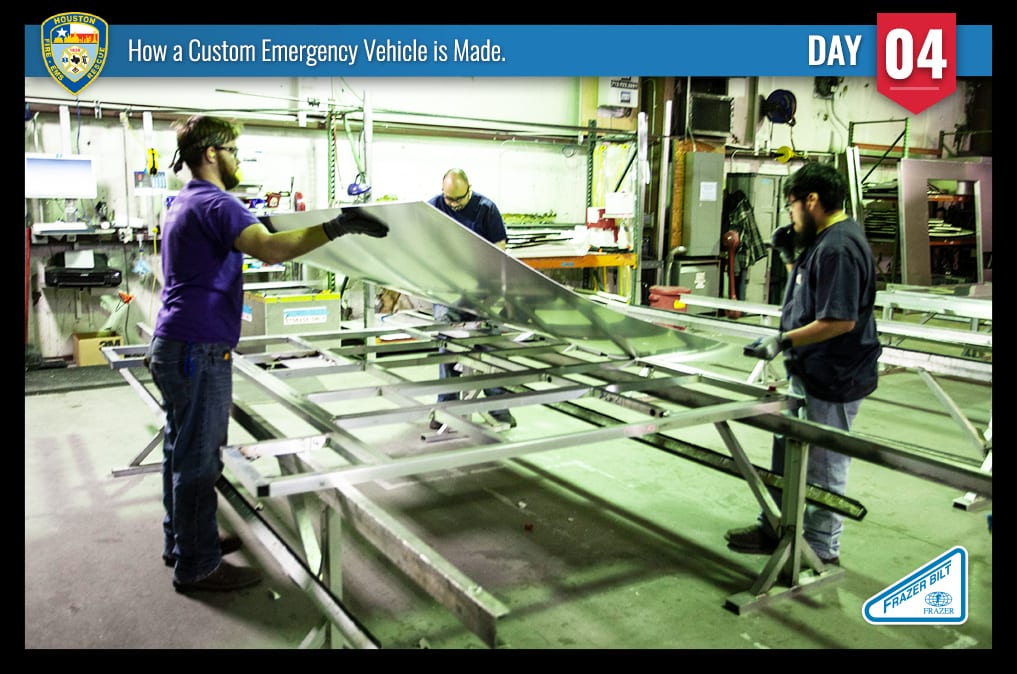
The crew now brings each section of the frame to the Skinning Area where it gets deburred, smoothing out any rough edges. Team members also cut notches to allow for wiring installation and bond the aluminum skin to the frame. Crews flip each section over and install precut insulation. Fiberglass Reinforced Plastic (FRP) panels are attached to the ceiling section. The center raceway is left open for easy installation of electrical wiring and equipment. Quality Control Team Members are then called in to inspect everything.
What’s next? Each section of the frame moves down the production line to the Box Assembly Area.
Day 5: Sections of the Module Frame Undergo a Quality Control Inspection
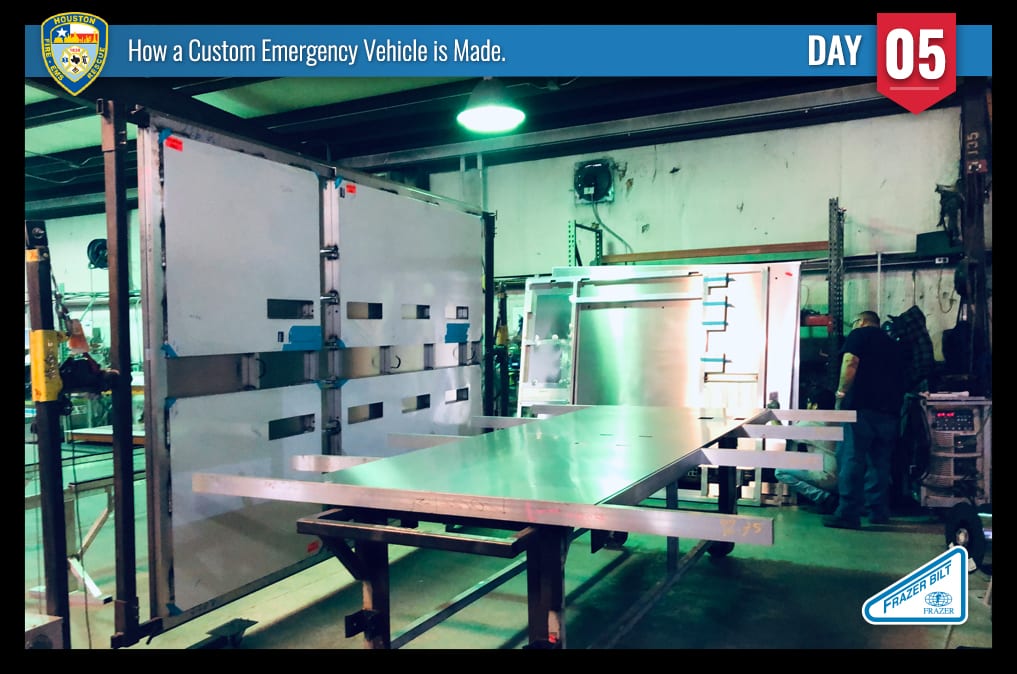
All six sections of the module frame undergo a Quality Control Inspection that includes checking bolts for the proper torque, layout of the wall insulation, and proper skin adhesion to the frame. The module frame is now ready for assembly.
Day 6: The Module Frame is Assembled
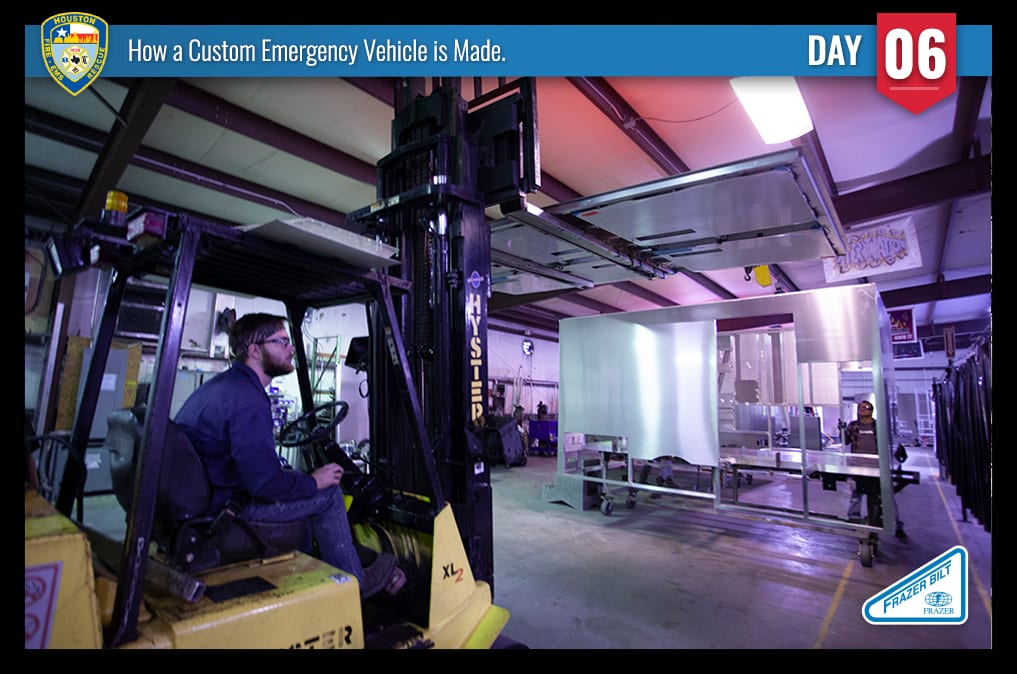
The base, rear, front, driver, and passenger sections of the module frame are clamped together, leveled into place, then welded to form a rectangular box. Crews use a forklift to attach the ceiling section (as show above). The module frame is now assembled.
Day 7: Crews Weld Storage Compartments into Place
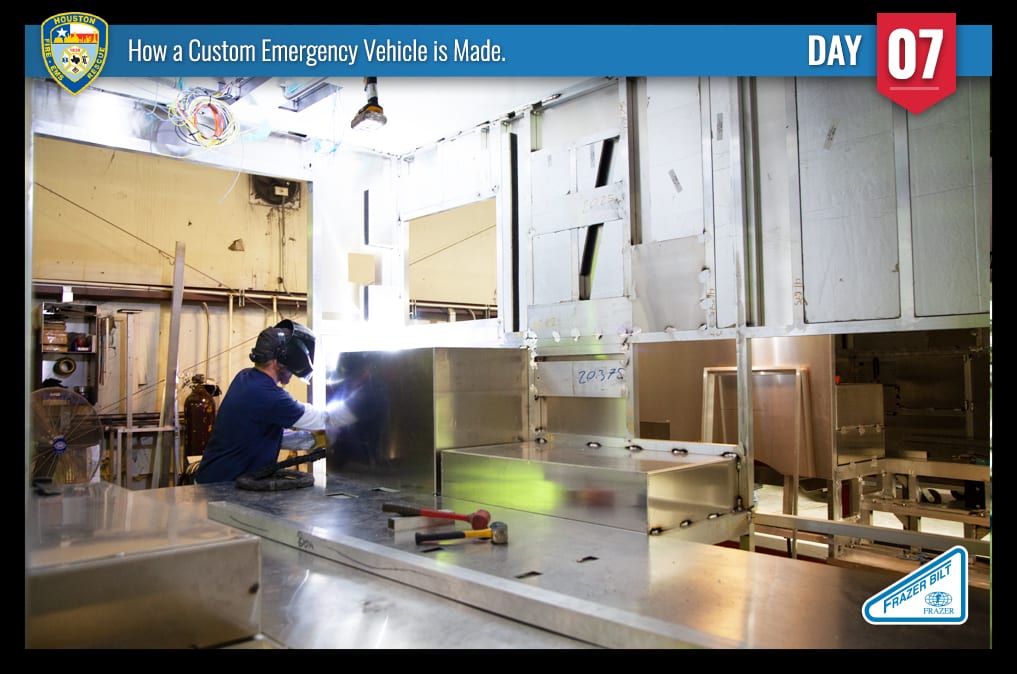
After running wiring in the ceiling raceway, crews install overhead grab rails. Crews also weld the rear passenger and driver side storage compartments into place.
What’s Next? The module frame will move down the production line to the Compartment Install Area.
Day 8: Compartment Installation
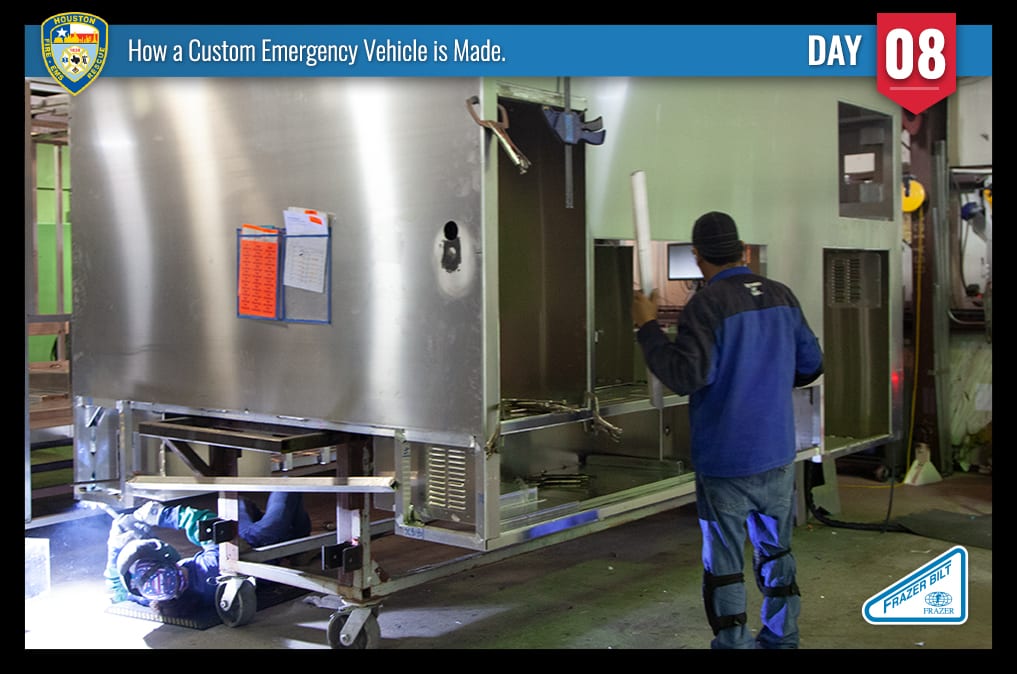
Crews begin installing additional compartments for gear, storage, and key components of the module.
These include compartments for:
- Oxygen
- Lower storage
- Electrical
- Storage above the wheel well
- The air conditioning unit
- The rear backboard
- The generator
- Front inside-outside storage
Workers clamp and weld the individual compartments into place, then bond each compartment with sealant.
Day 9: Door and Compartment Inserts

The box has moved to the Insert Station where a new set of employees picks up where the last left off. This crew’s task is to bond and weld door and compartment inserts, which look like giant aluminum picture frames, to the module, then seal the edges to prevent water exposure.
Day 10: Trim and Prep for Outside Lights
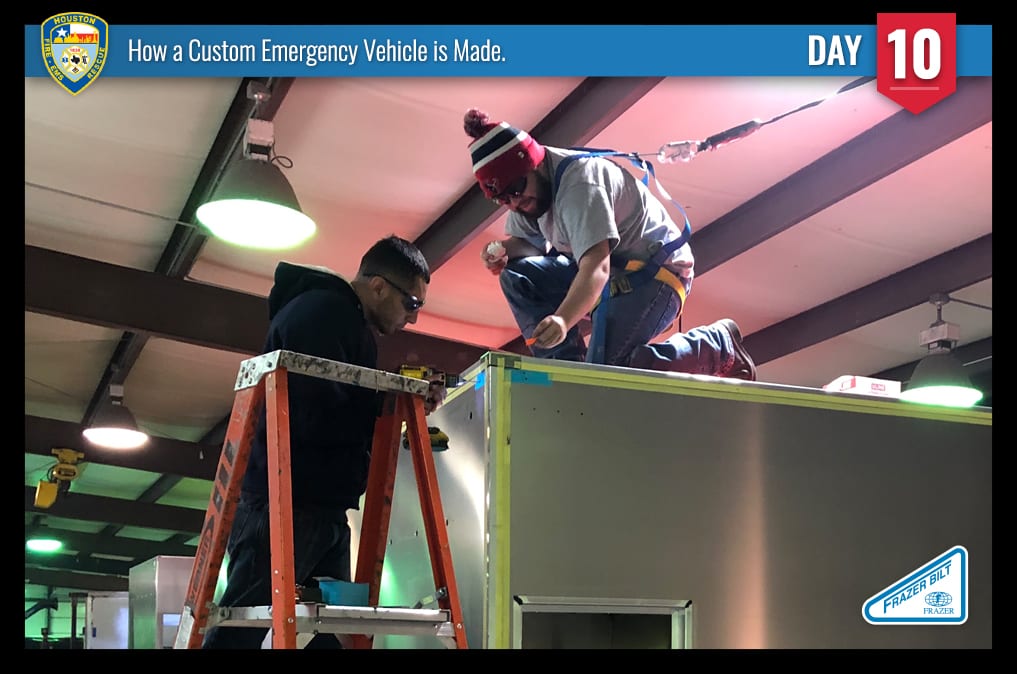
The module frame has moved to the Trim Area. Workers apply aluminum trim to cover the module’s edges, then seal the trim to prevent water exposure. A Quality Control member marks the location of outside lights; A crew member then drills holes to install wiring for the lights.
Day 11: Quality Control Inspection
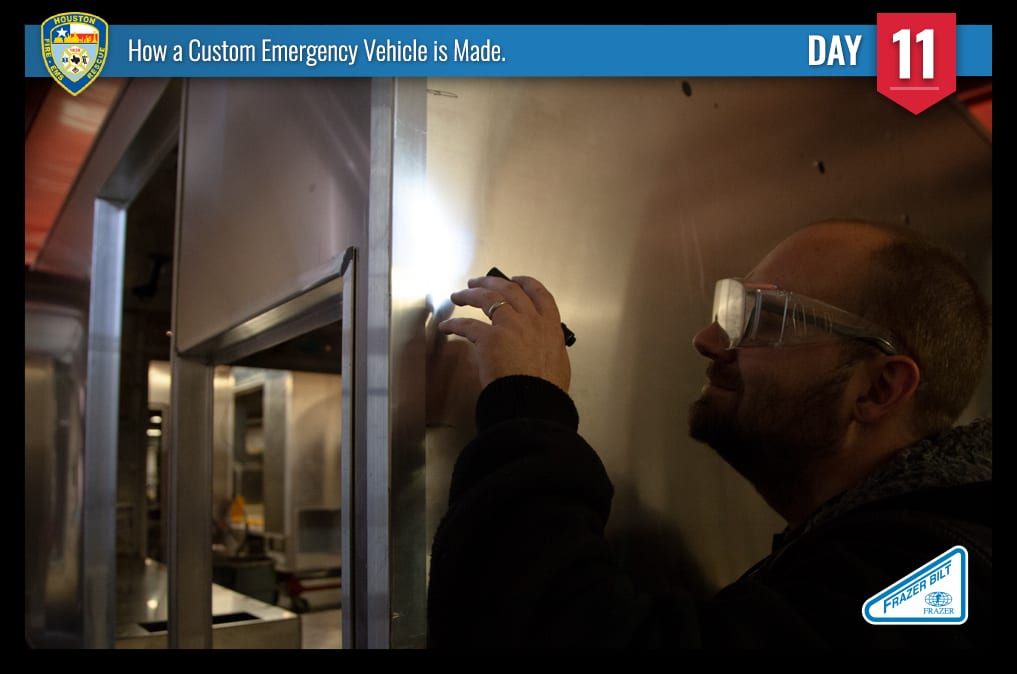
The module undergoes a Quality Control Inspection before paint and light installation. A Quality Control Team Member looks for: gaps in the trim’s seal, proper smoothness of the unit, and the placement accuracy for exterior lighting.
Day 12: Crews Fabricate Doors for the Module
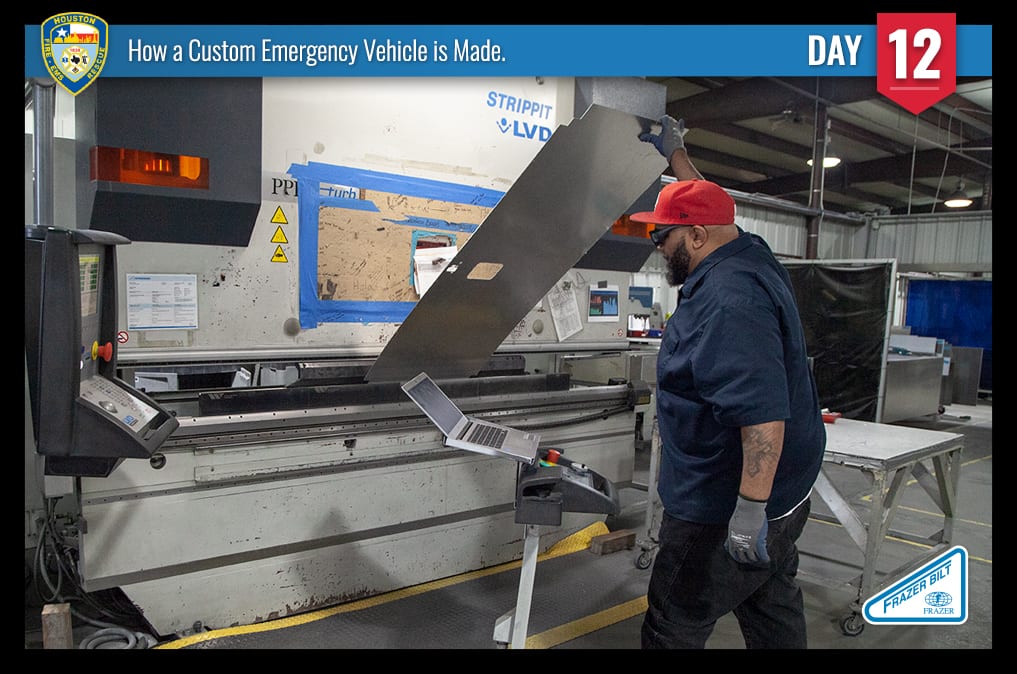
Crews fabricate doors for the module. Aluminum panels are pre-cut by machine, sanded down, and deburred to smooth out rough edges. Engineers program the Hydraulic Press Brake to precisely bend each panel into the shape of a door (as shown above).
What’s next? Crews will install the module’s flooring.
Day 13: Flooring Installation
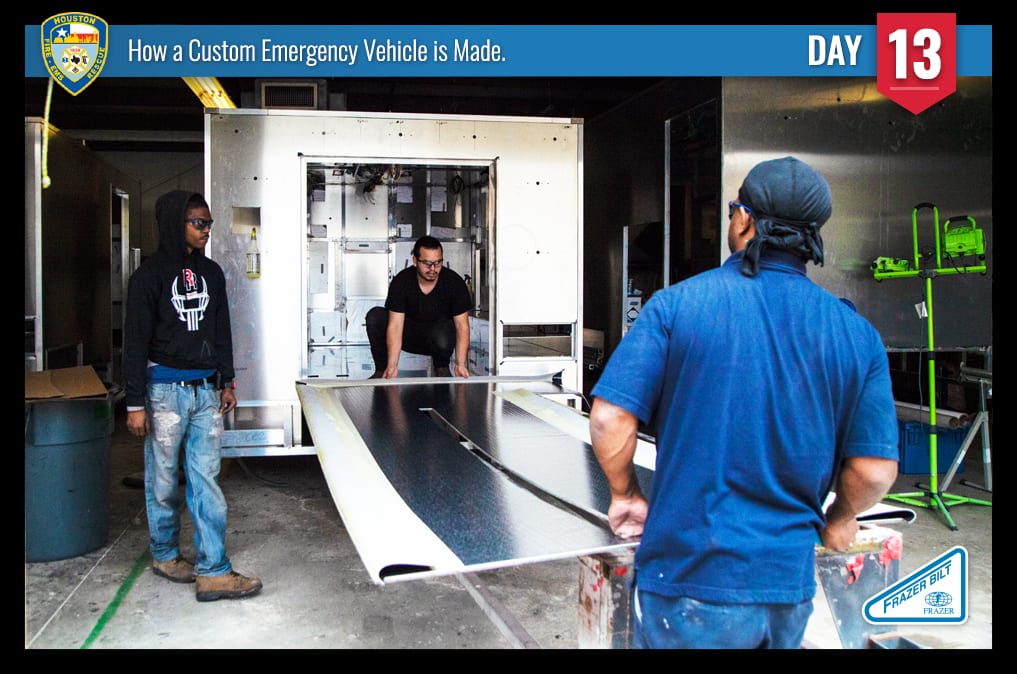
We’re “floored” with excitement to tell you about the first sign of interior work inside the module: Crews install flooring! The process is a little bit like making a leather book cover. Embossed vinyl flooring is cut to size, sprayed with adhesive, and wrapped around a pre-cut sheet of polycarbonate flooring material. Crews then carefully bond the flooring to the module’s aluminum subfloor (as shown above).
Day 14: The Electrical Shelf
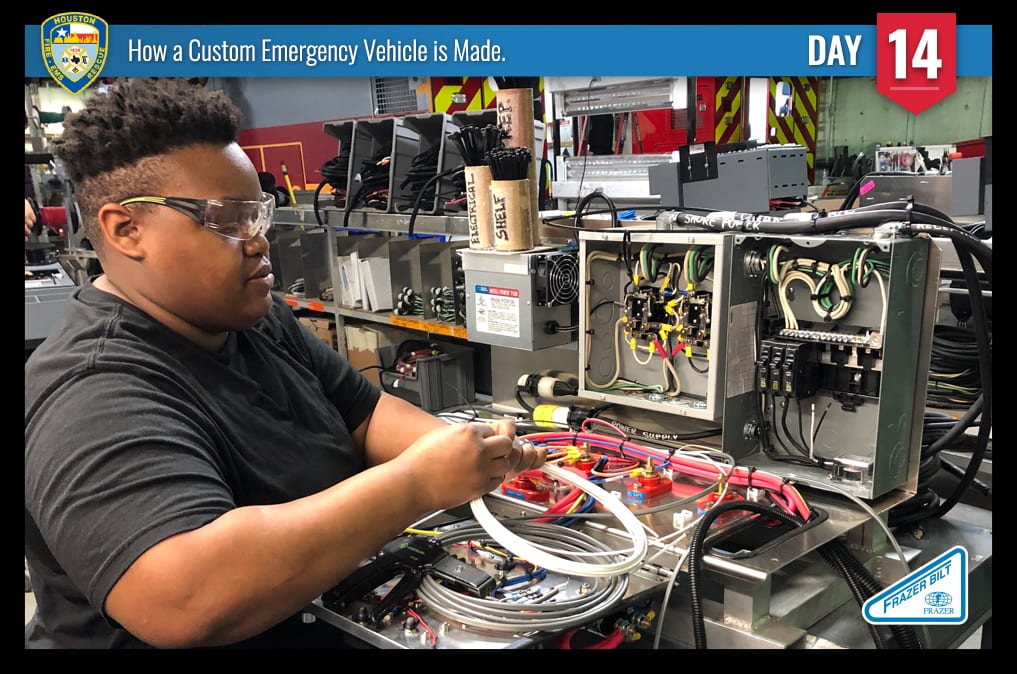
Work is underway on the electrical shelf, which is considered the heart of the unit. Much like veins carry blood to different parts of the body, wires carry electricity to various equipment like the air conditioner, emergency lights and sirens, interior lighting, and door locks.
What’s next? The module will be prepped for paint.
Day 15: Module Paint
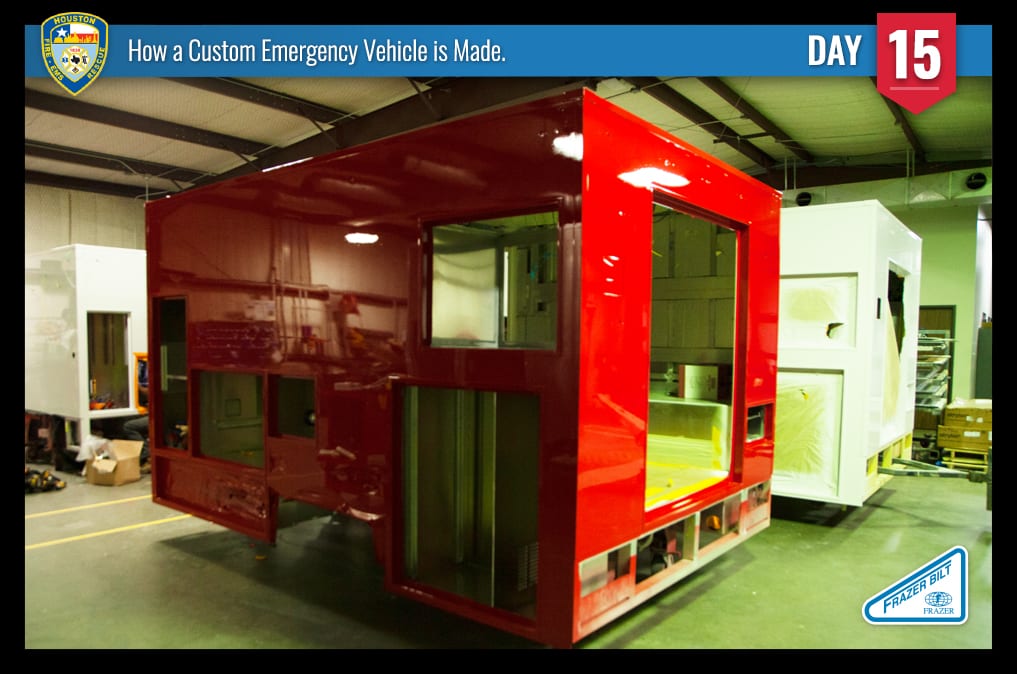
To prepare the module for painting, it is sanded and cleaned using a special cleaner that removes dust and prevents corrosion.
The module is then transported to the paint booth which provides a controlled environment that prevents dust and regulates humidity levels.
To ensure proper coverage, we coat the module with two coats of sealer and let it dry before spraying the module with 2 coats of red paint.
Once the module dries a second time, it is sprayed with 2 coats of clear to enhance it’s shine.
The module is then heated to 140 degrees for an hour in the paint booth; this allows the paint layers to cure, giving it an ultra-glossy finish.
Day 16: Electrical Installation
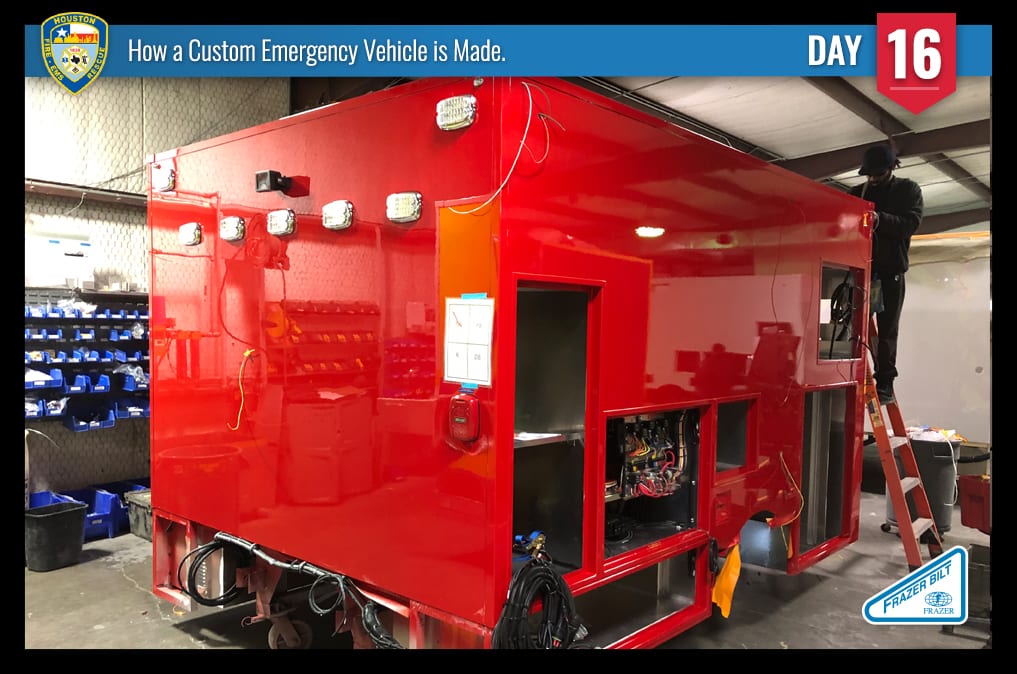
Let’s shine a light on what’s going on today: electrical work! Workers install the heart of the unit, the electrical shelf, which controls power to everything inside and outside the module. Crews also wire the marker, box, and emergency lights as well as a traffic signal preemption system.
Day 17: Door, A/C, Cabinet, and Countertop Installation
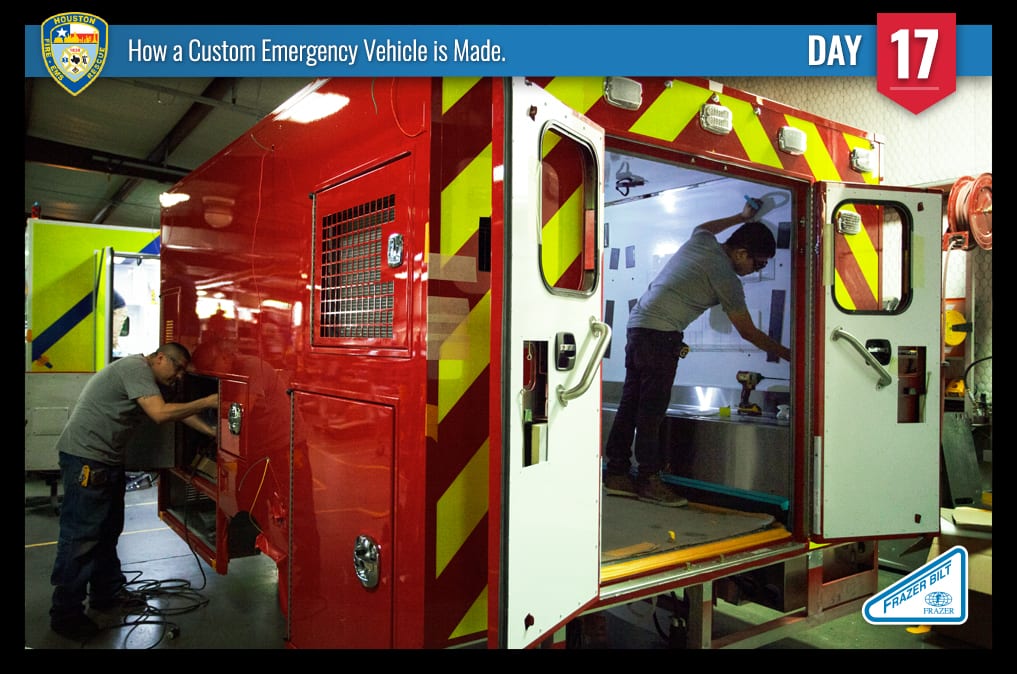
The shiny red box begins to take on the personality of a patient compartment. Outside the unit, workers attach doors and latches. Inside the unit, up to three crew members at a time work side by side to install key equipment that includes: Frazer’s independent 120V AC system, LifeDefender Cabinets, stainless steel countertops and the squad bench.
Day 18: The Box is Mounted to the Chassis
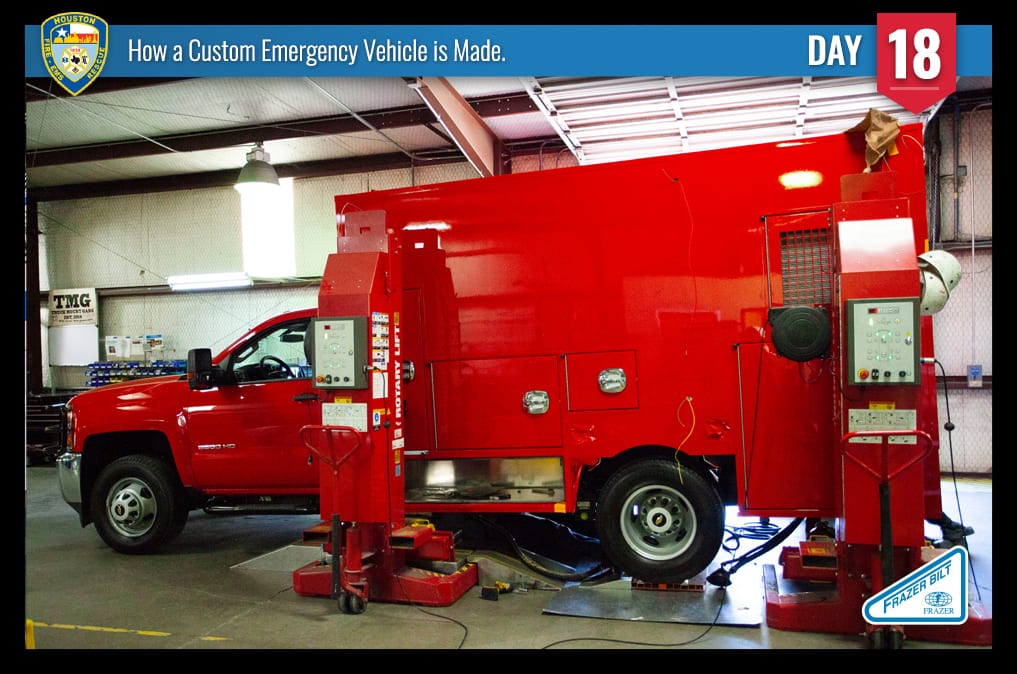
LiquidSpring™ Suspension System has been installed to provide a smoother ride. Today, the module is mounted on its chassis.
A hydraulic lift is used to lower the box onto a 2019 Chevy 3500 gasoline chassis.
A worker gets underneath the box and marks where to drill holes to attach the chassis frame. A second worker marks where to cut a hole for the cab’s pass through window.
The box is then lifted back up and away from the chassis. A crew member cuts the box’s pass through opening, as another crew member drills holes in the chassis frame.
The box is then lowered back down and bolted to the chassis frame.
Day 19: 120V Onan Generator Installed
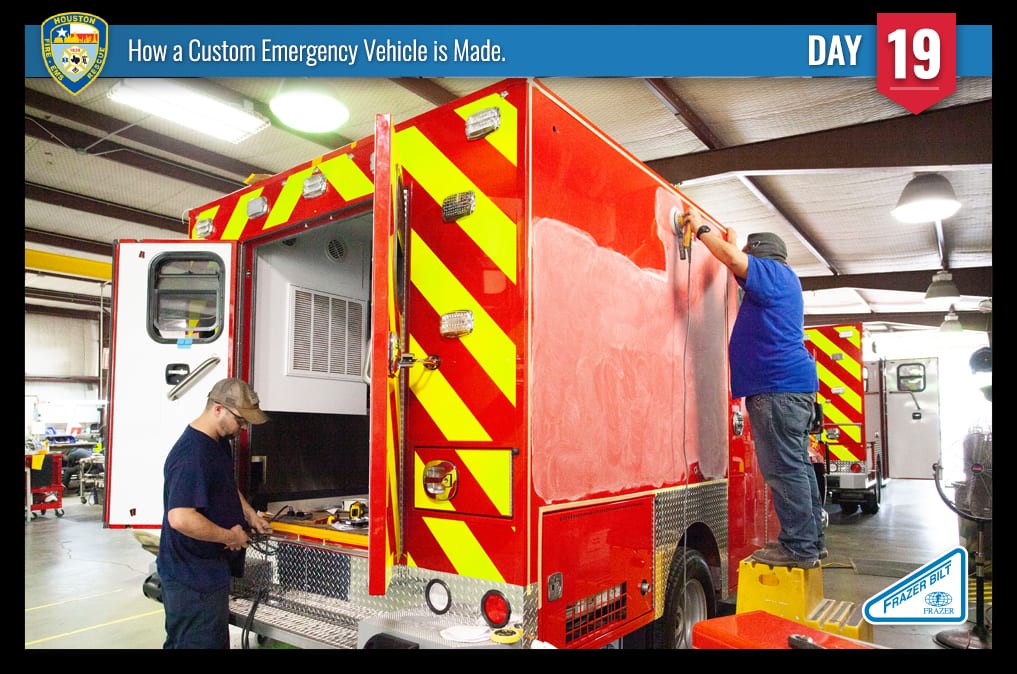
Crews install a 120V Cummins Onan Generator, Frazer’s signature bumper, and attach diamond plate aluminum cladding above the wheel wells and to the lower back of the box. Workers buff the outside of the unit to prepare for striping and lettering application. Inside the box, more accessories like corner netting, trash cans, and acrylic holders are installed.
Day 20: Interior Finish & Road Test
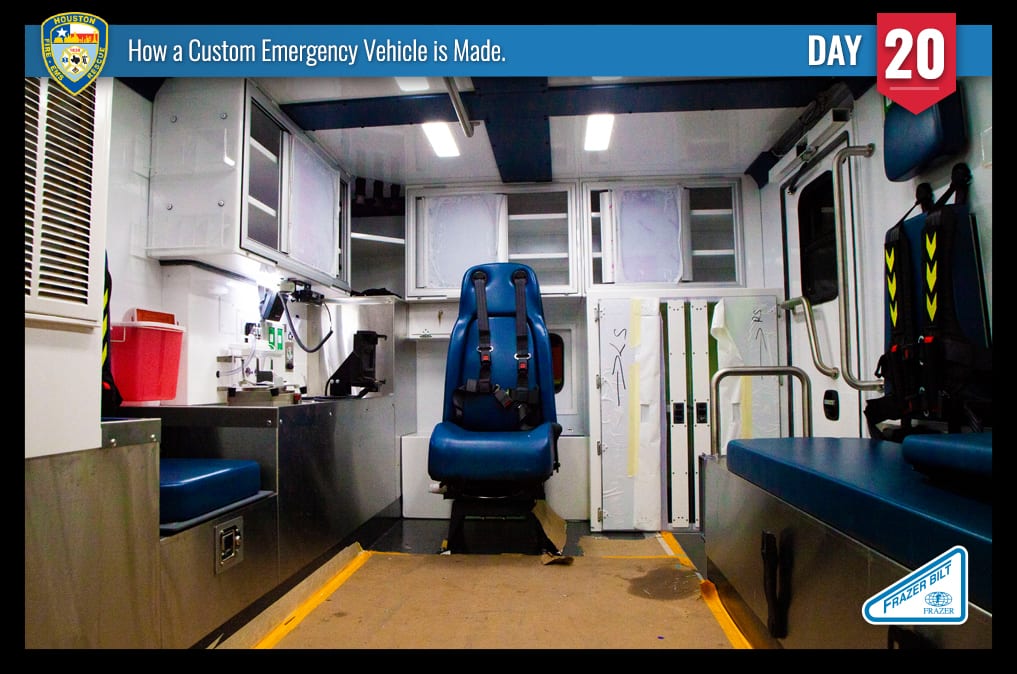
The interior finish is nearly complete. A Technimount™ mounting bracket and a radio system are installed. The emergency vehicle is road tested and the Quality Control team listens for unusual sounds. Quality Control Team members also check for smoothness of the ride’s rear axle LiquidSpring™ suspension system and inspect wires, hose connections, brackets, and bolts under the unit to make sure they are properly installed and secured.
DAY 21: Quality Control Inspections
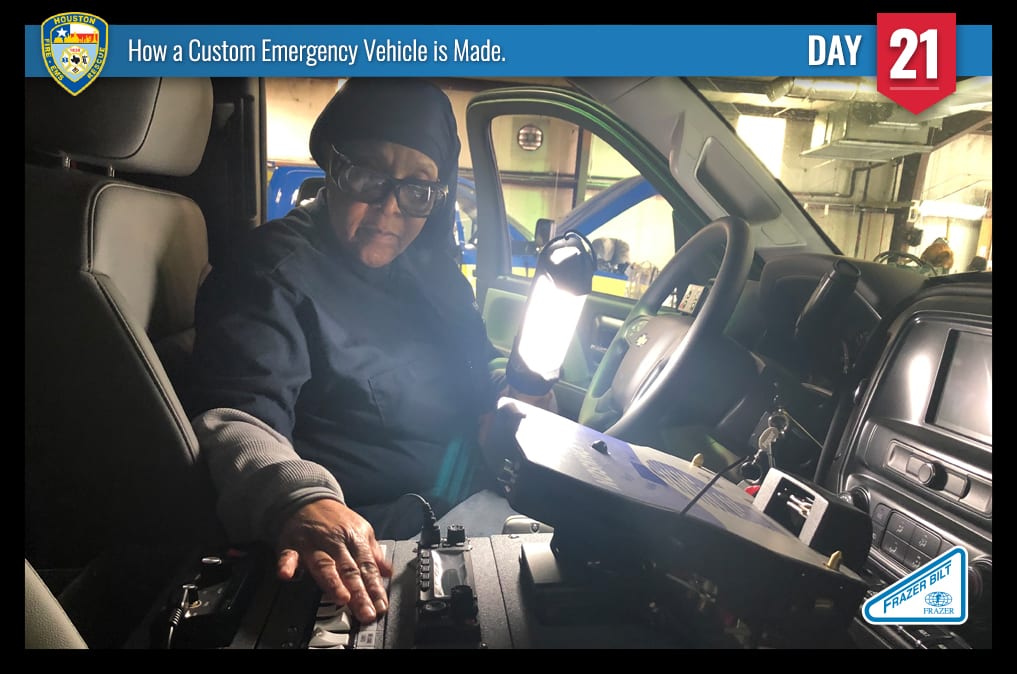
The unit undergoes several Quality Control Inspections. The cab’s console is inspected to make sure everything is connected and working properly. The module’s paint is checked again for any blemishes that may have occurred during the building process; Areas are then marked to be buffed and repainted. Crews test the air conditioner for proper airflow.
Day 22: Striping and Lettering
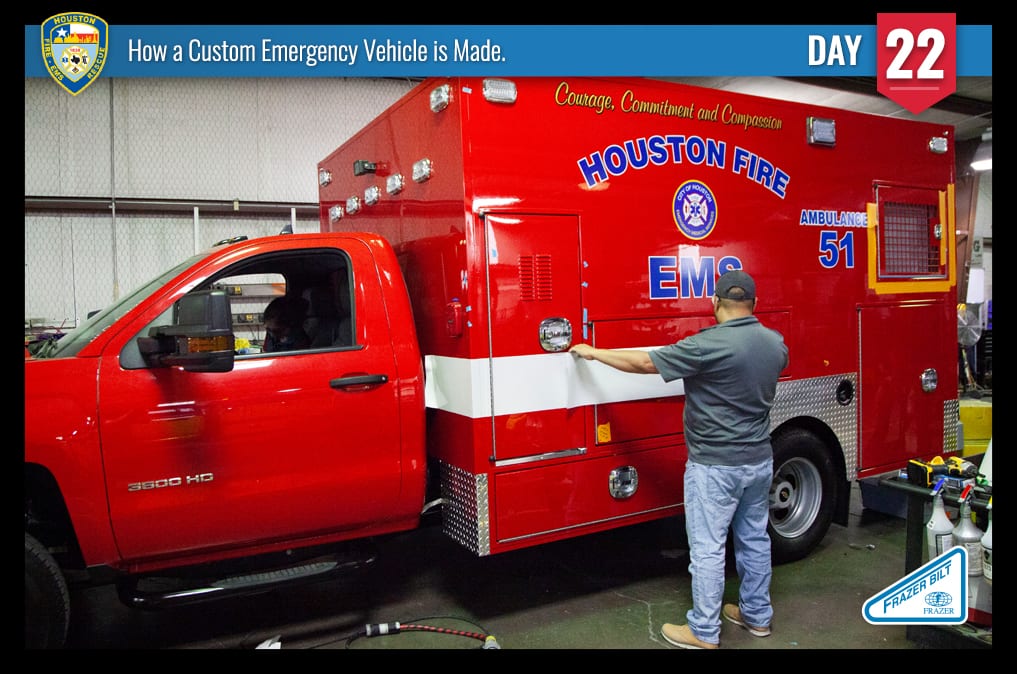
The shiny red unit gets striping and lettering today. Crews measure and mark where letters, numbers, and logos will be placed. Then, workers apply each graphic, smoothing out air pockets and bubbles as they go. Reflective striping is used to help the emergency vehicle be seen easily at night; it changes from black to gray to tan depending upon how the light hits it. All graphics are produced in-house by Frazer’s Striping and Lettering Department. SEE how Frazer preps a unit’s lettering by clicking here.
Day 23: Cot-Retention System and Padded Corner Trim Installation
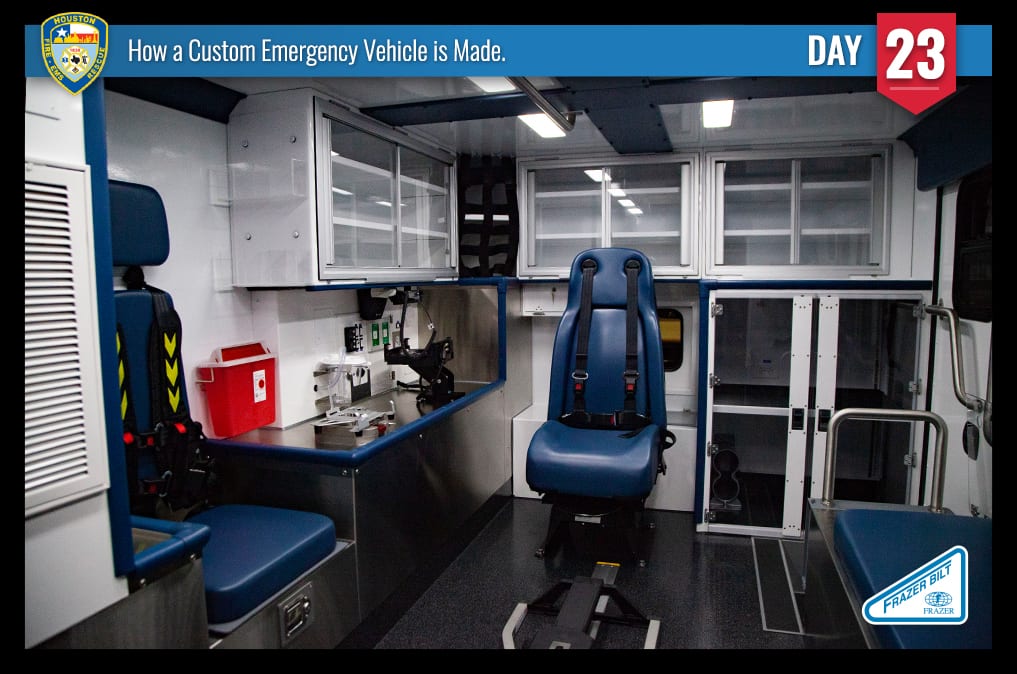
A cot-retention system is installed. Crews add padded corner trim to interior surfaces: countertops, edges of the front inside/outside cabinet, the bottom of the front wall, and action wall cabinets – basically, anywhere where there is a 90-degree angle.
The trim is detachable, which makes it easy to clean. It’s also coated with an antimicrobial treatment to prevent mold, fungus, bacteria, and odors.
Day 24: Final Inspection
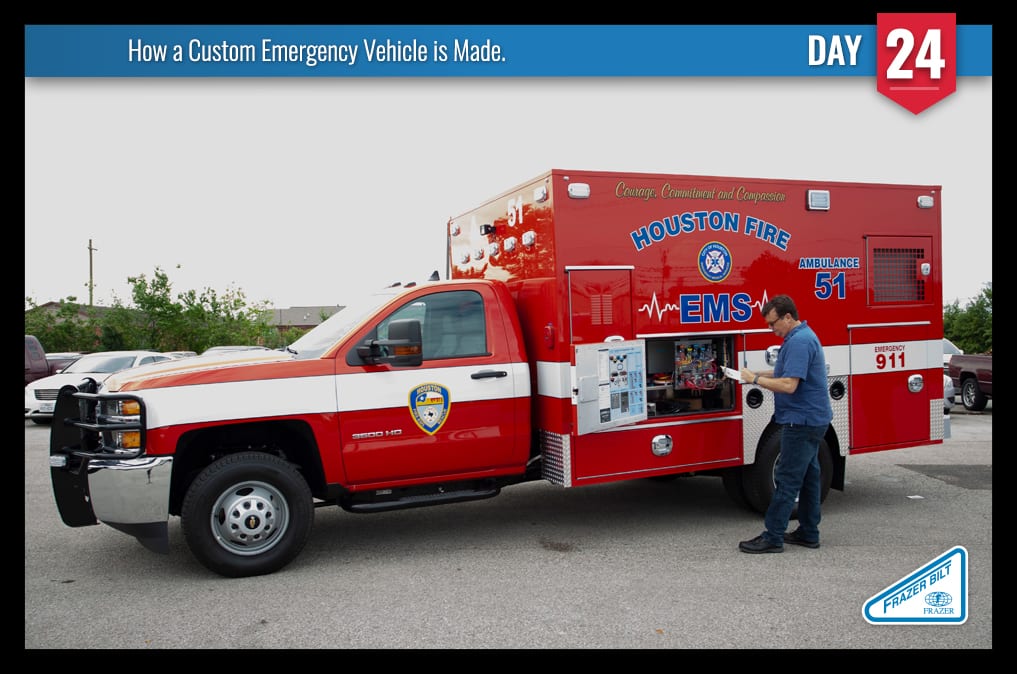
The Type I 12 ft custom emergency vehicle is now complete and undergoes its final inspection. The Sales Team does a walk-through to ensure that the customer has gotten exactly what they’ve ordered. All Frazer customers are invited to a final inspection before pick up or delivery.
Day 25: Delivery
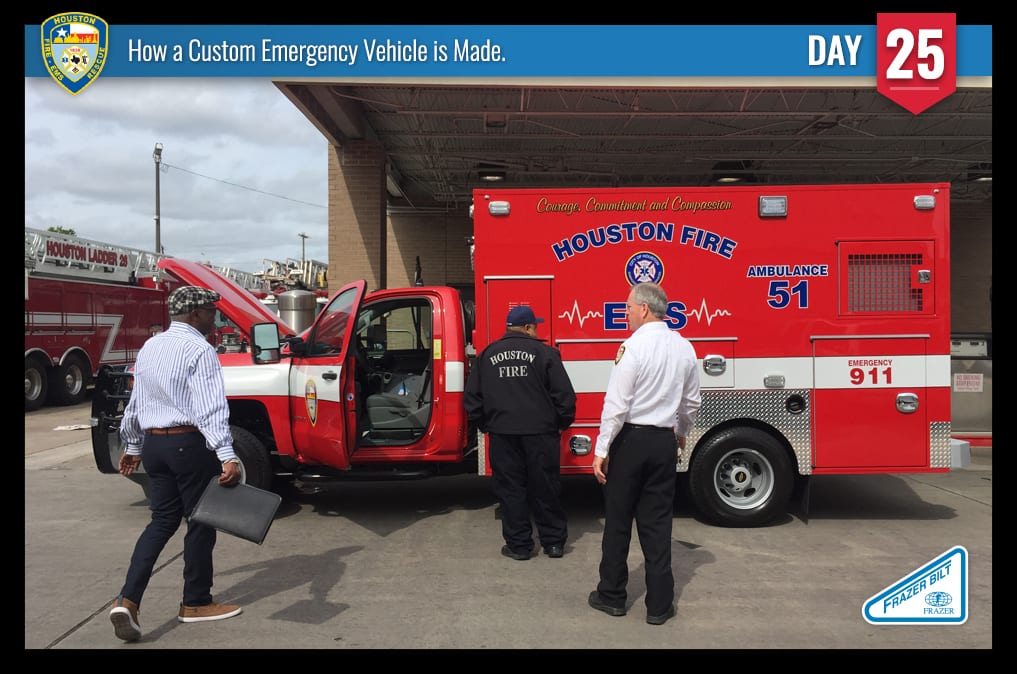
This custom emergency vehicle weaves through the streets of Houston along with two other units for delivery to the Houston Fire Department. Upon arrival, members of HFD check out their Type I Frazer first hand. From here, the emergency vehicle will head to its new home: HFD Station 51 on Bellaire Blvd.